
Hi, welcome here. In this post, you’re going to learn how to start using Anki properly right away.
Whether you’re planning on using Anki for medical school, MCAT, language learning, engineering (like I did) or for continuous learning (what I do now), this guide should set you off the right foot, with only the essentials, so you can:
- Immediately start using this awesome software
- Avoid the same mistakes that I did; and
- Have a roadmap that tells you what’s actually important when using Anki
By the way: if you’re here to use Anki for learning complex information and becoming an expert, make sure you check out my 4 Levels of Anki Mastery roadmap — it’s free and should give you clarity on what to focus on at each stage.
If you don’t know already, here are a couple of things Anki allows you to do in a nutshell:
- Study 1714.29% more efficiently as compared to those using conventional flashcards
- Encode information into long term memory at will, rather than by chance
- Remember anything you want without having to re-read
- Study anywhere! Studying felt less effortful than ever the moment I started using Anki before. What a blessing.
Now, this guide exists because I believe you just need to learn the few core info if you’re just looking to start.
It’s much like learning how to drive a car:
You don’t start driving a car by studying the ENTIRE manual. You only need to get better at using the ESSENTIAL controls to be able to start driving it.
The Anki manual is helpful, but it’s an app documentation rather than a quick-start guide.
You want a guide that’s Lean, rather than filled with information you can’t readily use.
Redditors seem to agree:
Overall, the goal of this guide is to make you a decent Anki user in the fastest way possible.
Real Talk: What is Anki? How does it work?
Anki is an open-source spaced repetition software that help you schedule reviews so you can interrupt the forgetting curve and make what you learn stick for the long-term.
You see, most of us believe that when we forget things, we just have a “poor memory”.
But the truth is that it’s NOT your fault that you’re forgetting, because schools merely teach us what to learn, but not how to learn.
Decades of research has already shown that most of what we know about study techniques are just passive learning methods, such as:
- Re-reading
- Highlighting
- Underlining
- Summarizing
- Writing down notes verbatim
In contrast, Anki works through ACTIVE learning and a proven mechanism to remember information long-term:
- Active learning through flashcard generation
- Memory-enhancing benefits of retrieval practice
- Increasing retrieval benefits through increasingly spaced intervals
Let’s talk about each.
#1. Anki forces you to actively learn information when you create your own flashcards

(Image credits to @ImpactWales on X)
This takes advantage of what’s called the Generation Effect.
Many people when they think about Anki being a “tool for long-term retention” they start to think that flashcard-making is “passive” and somehow a waste of time.
Effective Anki learners know that this is a mistake.
Creating your OWN cards actually SAVES you time — for a few reasons:
- The intermediate processes of card-making is effective studying. It combines effective active learning practices AND retrieval practice in just one process. NOTHING is more time-saving than that.
- Finding relationships to test, and generating the exact insight to make flashcard for → elaborative encoding
- Transforming that insight into question form → generation effect
- Retrieving the answer from your mind after writing down the question on the “Front” side → retrieval practice (or commonly known as “Active Recall”)
- Making your OWN questions shifts the focus on processing the material. You can’t make good flashcards about Physiology if you don’t know anything about the relationships.
- You can bring undivided attention to making EACH idea more memorable. Because you are the one learning the ideas before creating the prompts, you can add details that are relevant to YOU personally and make them easier to recall in the future.
- For example, personal relevance or examples at the “context” part (You’ll see later)
- Memory techniques + mnemonic flashcards
Meaning, as an Anki learner, skipping the process of making your own cards makes you automatically skip ALL these 3 benefits.
#2. Anki leverages the memory-enhancing benefits of retrieval practice (and LOWERS test anxiety!)
Every time you try to answer an Anki card before flipping it, you’re forcing your brain to reconstruct that information from scratch.
This reconstruction process is what actually builds memory — not the exposure to information itself.
The problem with traditional studying:
- Reading notes feels productive because information flows smoothly
- Everything makes sense in the moment
- But your brain isn’t doing any work — it’s just recognizing, not retrieving
Why Anki’s retrieval practice works:
- You can’t fake it — either you know it or you don’t. Which reduces your test anxiety
- The struggle to retrieve tells your brain “this is important”
- More effort to retrieve = stronger memory formation
The result:
People using Anki can recall specific details months or years later, while students who just re-read their notes forget everything within weeks.
Why? They practiced the actual skill they needed — pulling information from memory — while everyone else practiced recognizing information on a page.
#3. Anki enhances ALL powerful study techniques through increased retrieval effort
Anki combines three proven learning techniques into one system:
- Retrieval practice
- Spaced repetition
- Interleaved practice
The simple algorithm behind it all:
- 🔴 Again (forgot it) → See it in 1 minute
- 🟠 Hard → Interval × 1.2 (barely increases)
- 🟢 Good → Interval × 2.0 (standard spacing)
- 🔵 Easy → Interval × 2.0 × 1.3 (bigger spacing)
How spacing amplifies everything:
Cards you see after 3 days require more effort to recall than ones from 10 minutes ago. That extra effort is EXACTLY what locks information into long-term memory.
The spacing also creates automatic interleaving — you’re reviewing cards from different topics mixed together instead of being “siloed”. Your brain constantly switches contexts and discriminates between similar concepts, which creates more opportunities for connections between them.
The result:
You’re not just memorizing isolated facts. You’re building a web of interconnected knowledge that you can actually retrieve and use when you need it.
How to Start Using Anki
To start using Anki, you need a computer (or laptop) and/or smartphone — preferably, both.
(Plus, it’s much, much faster to create flashcards using a computer.)
Downloading Anki
To download Anki on your computer, head over to AnkiWeb and download Anki.

PRO TIP: Also install Anki on your smartphone — trust me on this one
I promise this will make you crazy efficient later on — but I won’t reveal much for now. Just follow the instructions in the meantime.
If you’re on Android:
You can also search for “AnkiDroid” and look for this one:

For iOS/iPadOS users:
- App Store: LINK
And of course, you could search for it in the App Store as well if you prefer the hard route:

“Why is Anki a paid app for Apple users?”
Simply because it’s where the developers get support for ongoing development. And they’ve been on it for a couple of years now.
You can even say that they’ve helped make a LOT of careers at this point — from undergrad students to grad students to full-fledged scientists…
I’d say that’s worth paying just $25 for!
Heck, even if it’s a paid app on Android, I’d still pay for it. It’s that amazing.
Okay, that’s enough for the installation. Let’s start actually using the thing.
Creating and Organizing Decks
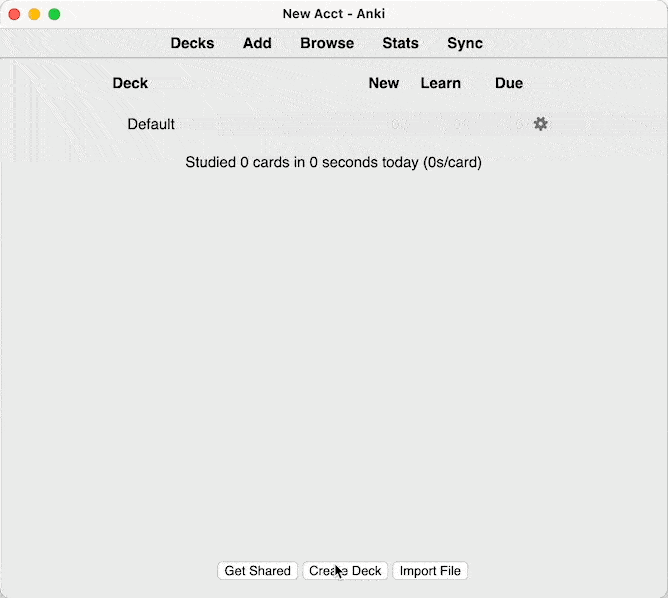
Once you’ve installed and opened Anki, you’ll see one specific deck named “Default”.
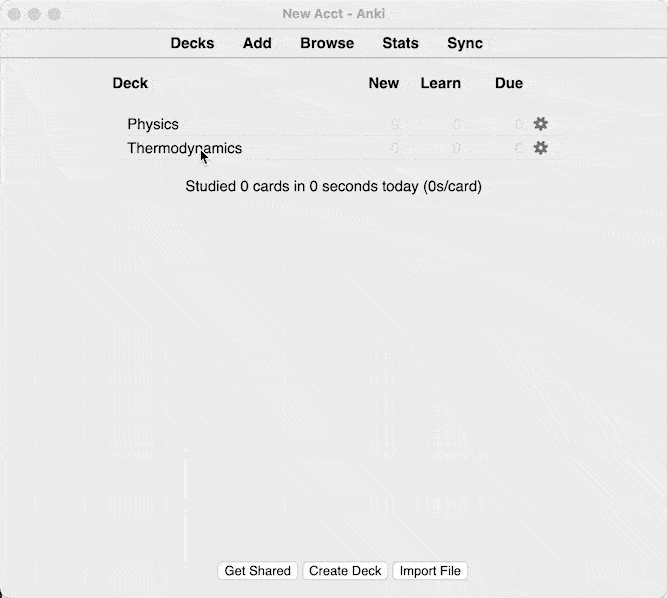
You can either choose to rename it or just create another deck of your own.
To create a new deck, just hit the “Create Deck” button on the bottom part of the Anki window. You’ll be asked for a Deck name; I like to use my subject’s name for this one.
If you’re a lifelong learner like me, you ideally want to create a single deck only. That’s because you’ll find that a lot of concepts, even in seemingly unrelated fields, tend to be loosely related.
On the other hand, if you’re a college student, then ask yourself:
“Am I learning things that would come up in a single retrieval context in the future? (ex: cumulative exam)“
If you answered “yes”, then you should put them in a single deck. (Supplementary Reading: Creating Effective Decks)
So think ahead!
By setting up your decks this way, you would be learning the concepts as a WHOLE unit, rather than as inert, isolated ideas.
Personal example:
Back when I was reviewing for my Engineering Board Exams here in the Philippines, I put together all of the things I learned on Communications Engineering under “EST” — the exam name.
I literally studied like 4 textbooks on that subject and filtered out unimportant stuff to get ahead more quickly.
Here’s what the deck looked like.

IIRC, I got 86 on that specific exam. When I counted my unsure answers, they were 16 items. Turns out I got 2 of those correct.
Instead of “Oh, everything I learned flew out of the window…”, and “I’m not sure whether I got them correct despite studying for hours.”…
…exams transform into something more binary. It’s either:
- You truly know it
- Or you don’t
In addition to creating decks, you can organize your decks into subdecks in two ways:
One, by using the format “MAINDECK::SUBDECK”. Example “Physics::Thermodynamics”.

And two, by dragging the deck over to the desired Master deck. Here’s an illustration.
I don’t recommend using the “subdeck” method very often, unless what you’re learning falls under a really broad subject.
Also, I don’t recommend you create a lot of subdecks—you’re better off using Tags instead for “Custom Study” purposes (more on this later).
Creating your first Anki cards
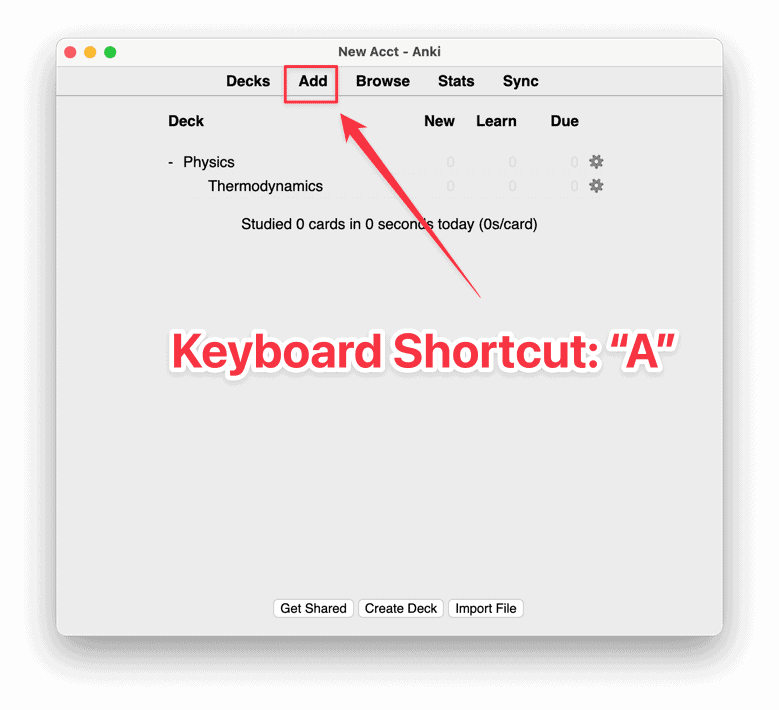
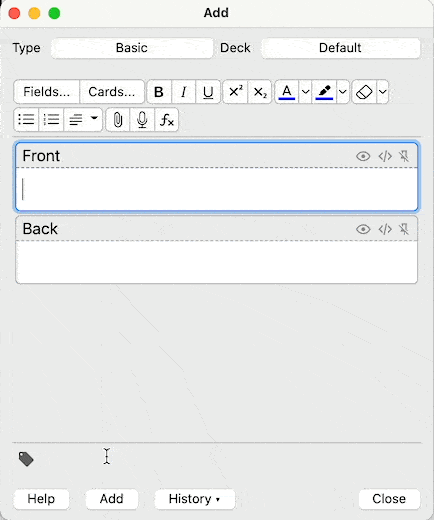
To create cards, just hit the “Add” on the top part of your window.
By clicking on it, you should be seeing the Add New window containing (1) Type, (2) Deck, (3) Front and Back fields, and (4) Tag field.
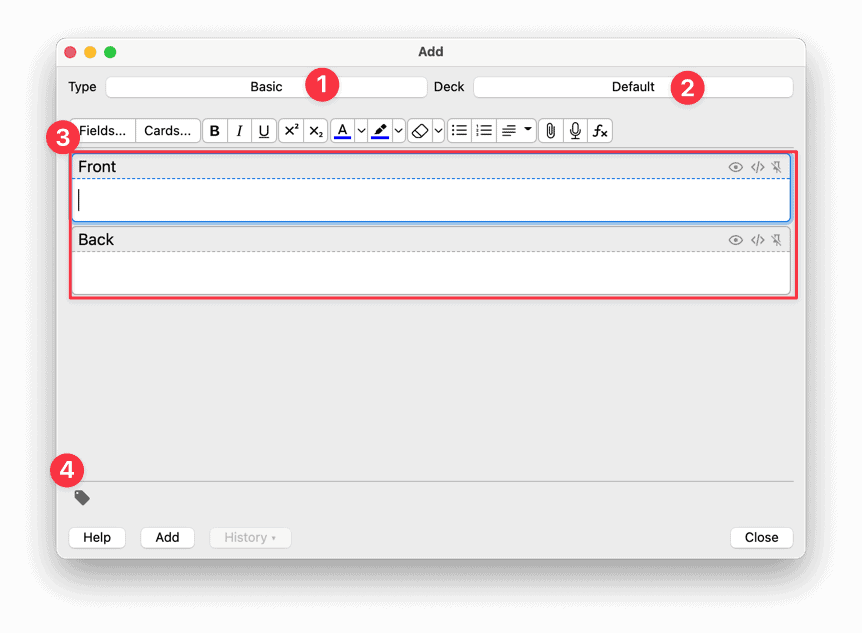
Now, I wouldn’t worry about the “Fields…” and “Cards…” buttons just yet. They’re just card customizations that don’t make any difference at all to your recall.
Like I said at the beginning of this guide, this is supposed to be about the essentials — and they’re just ain’t it.
So don’t even think that you need them.
Trust me, you’ll get VERY FAR without even touching those things.
Now, in the “Add New” window, the question goes in “Front” and the answer goes in “Back” field, just like your good ol’ paper flashcards.
Once you’ve entered your desired Question and Answer pair, you can click on “Add” or just use the shortcut “Ctrl + Enter” or “Cmd + Enter” to make the card.
Note: Make sure to DOUBLE CHECK the “Deck” field before adding the card to prevent future headaches.
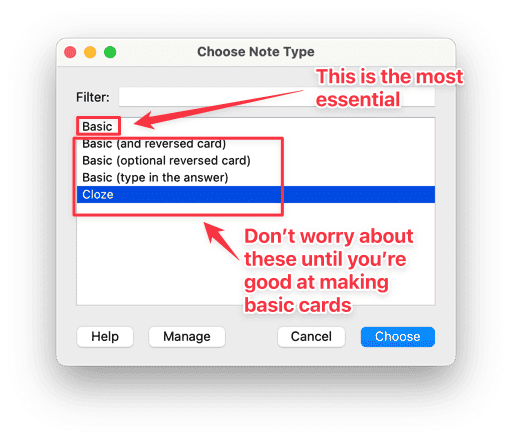
By the way, the card you’ve just seen is one of the “Basic” Card Types.

The “Basic” card type allows you to perform the traditional flashcard studying — Question in front, Answer at the back.
The Cloze deletion, on the other hand, is a “fill-in-the-blank” type of card.
The others are self-explanatory based on their name.
Question, foreseen: Which Anki card types are the best for learning?
YES. The answer is yes…but I’ll explain.
The best card type is the one that has the best fit for the information you have learned.
And guess what? The most flexible way to do that (without sacrificing the quality of learning) is by making Q&A cards with a Basic card type.
I’m speaking from experience, too: Cloze and reversed cards are hard to pull off unless you know how to create quality cards.
So my advice to you is to practice creating questions and answers first using a Basic card type. Only create Cloze cards for things that cannot be answered through recognition memory.
In short, start with only using Basic cards. Worry about the others once you can already make that work for you.
Organizing your cards
Like I said earlier, I like to use Tags instead of subdecks.
Why tags? Because it simplifies everything. You need not worry about creating subdecks for each subject because you can use “Custom Study” more selectively later on.
You can add Tags to your cards in two ways:
- During Card Creation, or
- Using the Card Browser
I recommend adding Tags during Card Creation — it’s much faster and more proactive.
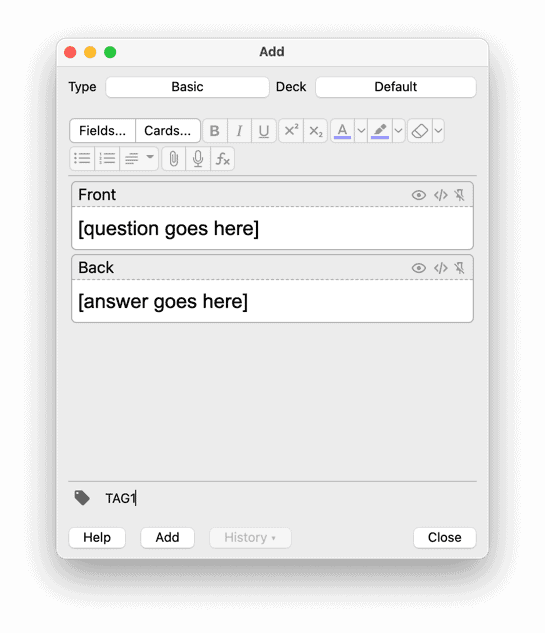
To add Tags during card creation, you just enter the name of your desired Tag on the “Tags” field of the Add New window.
Here’s something to remember: Replace spaces with underscores.
Note: If you missed that and accidentally entered two words separated by spaces, you’ll be creating TWO tags for your cards, not one.
Now, creating that card, you should notice that the Tag name you entered in the Tags field did not go away.
This means you can create and create several cards without having to worry about putting Tags in every single time—that’s pretty handy.
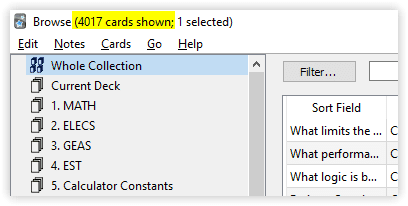
The second method of adding tags is via the Card Browser. You open it up by clicking on “Browse” on the Home Screen or pressing “B” in the same place.
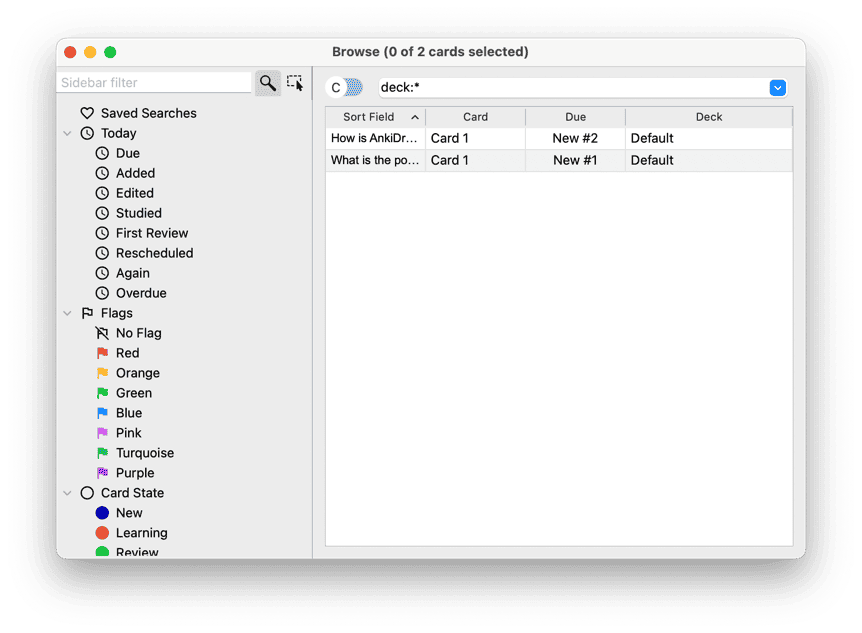
Here’s how:
- Click on a deck where you can find the to-be-tagged cards
- Select your cards on the right-hand side (you can select multiple)
- Right-click, then go to Notes > Add Tags
I don’t prefer this method because it’s rather easy to mess this up.
Imagine accidentally adding tags to other cards when you already have a large collection of cards — just thinking about organizing it is already a disaster.
But, you do what you wanna do 🙂
Reviewing Your Cards
Reviewing your cards is pretty straightforward.
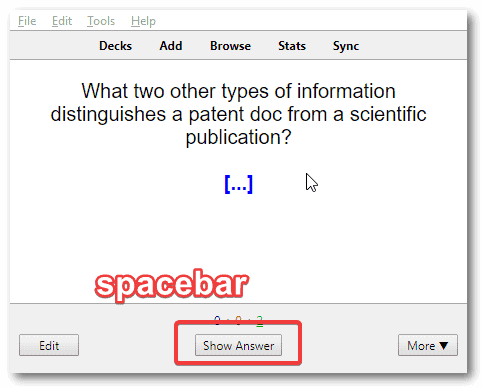
On the deck screen, you just click on the deck name with due cards, click “Study Now” (or press Spacebar), and then start answering your questions.

Just to be clear, when I am presented with a card:
- I’m reading the question
- I think of the answer
- I press the Show Answer shortcut, Spacebar
Note that if I’m still at step 2 and really couldn’t recall anything, I press Show Answer to see the correct answer.
Then, you choose the answer button.
Which answer button do I press after “Show Answer”?

We keep this simple and lean:
- Correct = “Good”. If you get the card right, you tell Anki that you got it correctly. (Shortcut: Spacebar)
- Wrong = “Again”. If you get the card wrong OR if you really cannot recall the answer to a question, you tell Anki to “show it again in [X minutes]” depending on the settings. (Shortcut: 1)
“I finished my reviews — where did my cards go?”
Once you’re done reviewing, the cards won’t show up until its next schedule.
So if you’re asking, “Where are my cards?” — they’re still there. But they’ll show up for a review again after 1 day.
A lot of people get freaked out by this because they are used to repeating things over and over “until they get it.”
That is actually unnecessary when you use effective study methods.
If you got the recall correctly today, then that’s all you need to do. You’re done studying for today, even if you didn’t feel like you did a thing.
You get the retention benefits from effortful retrieval, not from repeated exposure or repetition en masse.
If you kept on repeating information over and over without effort, there is simply no lasting benefit.
I could go on forever, but to put it simply: You gotta trust the process. You WILL retain information when you review this way.
IMPORTANT: NEVER Miss a Day of Review
Forgetting happens every single day. This means that poorly learned, seldomly used information are good as DELETED every single day.
Anki works to combat this effect. (But again, follow my tip#1 when creating cards)
Another reason not to skip is you end up with a mountain of cards the next day. Yup, now you’ll have to review your overdue cards PLUS your due cards — that’s a hell of a review session to go through (trust me, I’ve been through 1500 cards in a day and I almost cried just doing that).
So, try do study every single day without fail.
How to use AnkiDroid: Watch This Video
If you’re planning on using Anki on your Android phone, you better watch this video for an introduction.
For iOS/iPadOS users, how they work should be similar — you shouldn’t have a lot of problems doing the same things that you can do in AnkiDroid in AnkiMobile.
“Isn’t Anki just good for memorizing small facts?”
Contrary to popular belief, just because Anki is a flashcard app doesn’t mean it’s only used for memorizing words or raw facts.
Personally, I’ve used it with great success for all kinds of things — From Algebra to Advanced Engineering Mathematics, Physics, Electronics Engineering, Electronic Communications, Marketing, Business, Content Creation, Control Systems Engineering, Birthdays, and so on.
I never skip Anki because in my mind, if I don’t retain all the prerequisite knowledge I’m required to remember, then it’d be hard for me to understand higher-level concepts in the future. (Ultimately, this causes even more wasted time.)
“If Anki is so effective, then why do so many people fail at using it?”
Why do SO MANY people go into flashcard hell?
Glad you asked. A few reasons why:
- They use shared decks (most of which are ineffective). They keep trying to remember what they haven’t even learned yet. Learn before you memorize!
- They have an unwieldy deck structure. Don’t create artificial knowledge barriers! As a rule of thumb, you should have one deck for each retrieval context. (exam, interview, language, field, etc.) NOT a deck for every section or topic of a book!
- Intermittent Reviews. They do Anki reviews intermittently—as if natural forgetting can be “skipped.”
- Their thinking is stuck in Anki and ignore the other 2/3 of the learning process. They functionally fix themselves into Anki — they see it as “the entire system” when really, it’s really just “a small part of the engine”. Learning skills matter.
Note: I’m well aware that you can use shared decks effectively for standardized exams, but I really don’t recommend it — UNLESS you’re in Medical School. I know of people who’ve created and used high-quality shared decks with great success, and you can find them here.
Thing is, most of these people who fail at using Anki treat is as a magic pill, instead of a tool that requires skill. (Woah, that rhymed…)
As Michael Nielsen put it in his essay:
Anki is an extremely simple program […] Despite that simplicity, it’s an incredibly powerful tool. And, like many tools, it requires skill to use well. It’s worth thinking of Anki as a skill that can be developed to virtuoso levels, and attempting to continue to level up toward such virtuosity.
Tips for Creating Good Anki Flashcards
1 – Learn FIRST, and THEN create flashcards from what you’ve learned
Just like what I said a while ago, you gotta learn first before you make your cards.
If you’re just starting out, all you need to know is that the purpose of these flashcards is to test what you already learned.
Folks, it’s “remember what you learn“, and not “learn what you remember“.
It’s easy to get confident that you can remember anything using Anki, but the truth is that NONE of that matters if you do not understand the material you’re putting in.
(Unless you’re really memorizing isolated facts, but even so, context matters for retention)
Well, what’s the worst that could happen when you don’t follow this rule?
You’ll know how to answer the flashcard but you’ll find out that you cannot apply the “knowledge” anywhere else.
In other words, you just get pseudoknowledge.
2 – One simple card is worth 2x the vague cards
Don’t try to put in paragraphs in a card.
Don’t even try to put “Explain” type of questions.
Break them down until it’s simple FOR YOU.
This brings me to my next point.
3 – The number of cards don’t matter much; coverage matters more
There’s no optimal number of cards.
Think about what’s important here: It’s important that you have made cards that can cover the entire material you’ve understood.
So when adding cards, it doesn’t matter if you have plenty of cards just by studying a chapter as long as you follow the two rules above.
What matters is you actually learn the concepts thoroughly.
Break a concept as much as possible.
By doing these two things, you’ll feel like you’re able to recall each card in less than a second. (Well, not physically less than a second, but that’s how it’ll feel like 😉)
It’s much, much faster compared to creating a few but long, complicated cards.
For example, instead of:
“What are Newton’s Three Laws of Motion?”
You write questions like:
- “What is Newton’s First Law of Motion?”
- “What is Newton’s Third Law of Motion?”
- “Which law states F=ma?” (obviously, this question covers one law in another angle — also called redundancy)
This reduces ambiguity — making your cards faster to answer. Compare that to doing a mini-brain dump for each card and you’ll realize it gets tiresome pretty quickly.
Just to be clear, there’s no stopping you from creating both types of cards.
Feel free to experiment, because there really are times when a longer card can be more efficient. Let’s avoid black-and-white thinking here.
Example: Here’s How I Make Anki Flashcards
When you’re creating your cards, IMO the best way to create high-quality cards is to have these elements in place:
- A specific question
- A specific answer
- Screenshot of source
- Tags (optional)
You should be good as long as you have those.
To demonstrate, I’ll be using a random book from the medical field (a field I don’t know anything about) just to demonstrate this process from a beginner standpoint.
So, when I see something on my book like this:

This card below is the one I make. I included the Question, Answer, Screenshot, and Tag.
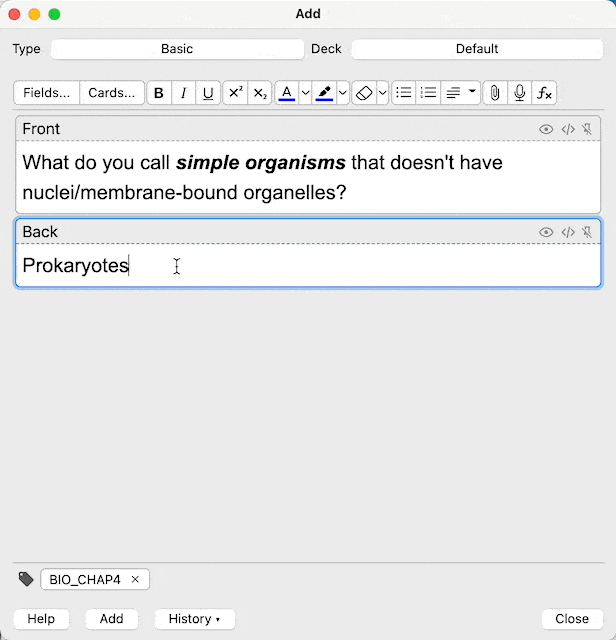
Notice that I italicized and bolded the word “previously” to show emphasis. It’s a way to make a cue for an answer more salient and easier to process.
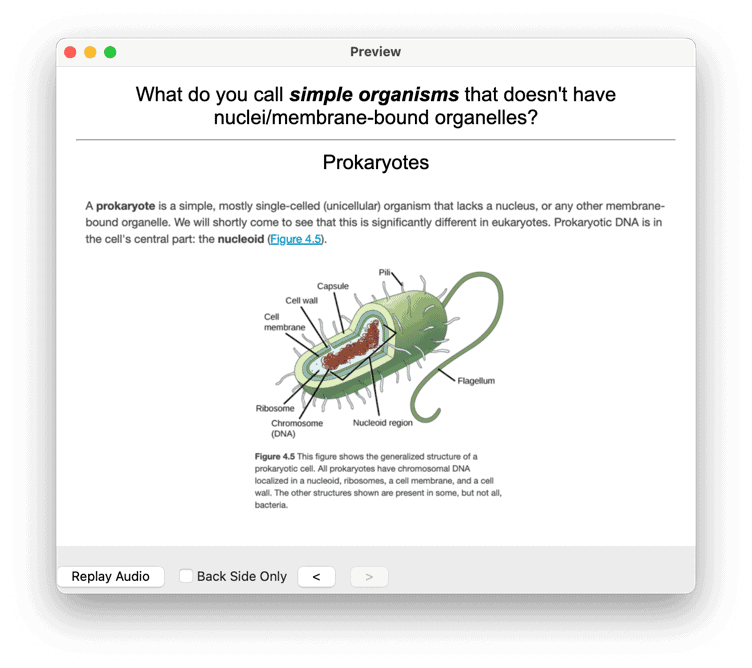
Let’s look at the card preview.
By the way, I want to tell you that for dense conceptual subjects, I break each concept down into more questions that test my understanding.
And this requires that I understand the thing FIRST.
This is the iron rule of effective card-making…
Learn first before you memorize! (Rules #1 and #2 in the classic Twenty Rules of Formulating Knowledge)
Facts are good to include as cards, for sure. But you have to encourage your understanding of the material — otherwise you’ll end up doing rote memorization. You’ll end up with a LOT of knowledge that you cannot even use.
A pro tip from me:
You can also simulate situations that use the concept itself so you don’t miss out on actually applying what you have learned.
See this card, for example:

See how that works?
Alright, let’s move on to what you need to remember when creating new cards.
Still not sure how to properly structure your flashcards?
Well, in that case, I made a quick reference of examples just for you.
This quick reference will show you 13 flashcard examples and anti-examples so you can get started making good flashcards and avoid creating bad ones.
Specifically, you’re going to discover some of the most important lessons I’ve gained from manually creating 4000+ flashcards:
You can click the red button below to go to the signup page.
Tips to Make Anki More Efficient for Studying
Tip #1. Use AnkiWeb Sync
Head over to Anki Sign Up and register for an account. It’s totally free. That’s why Damien Elmes is a hero.
Then, after creating an account, press ‘Sync’ on your Anki’s home screen.

A dialog box requiring your details will pop up.
Simply enter the details you signed up for at AnkiWeb, and this will allow automatic syncing of your deck to the AnkiWeb servers—which allows you to sync your cards to ALL devices.
It’s pretty neat, especially if you’re going outside with your smartphone. (or when you’re sitting on the toilet — not exactly neat, tho)
When you’re waiting in line, or just doing nothing at all, instead of scrolling through Facebook, you can answer 5 to 20 cards in a minute, depending on how good you create cards.
That means you’re converting idle time into STUDYING.
If that isn’t called studying smart, I don’t know what is.
You can turn it off and manually sync your cards by pressing Y on the home screen, but it’s always a good idea to sync your cards automatically upon open/exit just to avoid forgetting.
Tip #2. Make Sure You Smash That Spacebar!
When a card shows up, you just press on the spacebar to show the answer.
When the answer shows up, you are given choices below to choose from: Again, Good, Easy.
Using Anki default settings, Anki will show the card again after a certain amount depending on how difficult it was for you to recall the card.
- Again – Less than a minute, the card will show up again
- Good – The card will show up in less than 10 minutes
- Easy – The card will show up after 4 days
My method is simple:
- You press Again when you failed to recall the answer,
- You press Good when you successfully recall the answer
- You press Easy when you meet two things: you already know the answer a long time ago, and you have recalled the answer in an instant
Tip #3. Use shortcuts for Answer Buttons
You can use Answer Button shortcuts as shown below:

As a side note for default settings, pressing “Again” on a mature card for a total of 8 times makes your card “disappear” and not show up for review.
This is called a “Leech card”, and is usually classified as a poorly created card.
When you get Leech cards, all you have to do is reformulate your questions. Again, refer back to how I told you to create flashcards.
Alright, now before I end this, I would like to give you some tips that would help you study smarter using Anki.
Closing Thoughts: Anki is a powerful tool for learning — but only if you make your OWN flashcards
As powerful as Anki is, it’s just a tool that depends on your skills — and I want to make sure I drive that point home.
There’s always a sense of “wonder” in exploring new tools especially when it promises to solve our problems with having the lack of time.
But my advice, from experience, is to look at efficiency a different way:
Instead of adding tools, think about eliminating wastes.
That’s the purpose of tools in the first place — to help us eliminate effort that isn’t adding any value or not leading us closer to our goal.
Anki eliminates the non-value-adding activity called “scheduling your reviews and worrying about whether you need to review each item today or not.” (Yeah, that’s a mouthful)
But do NOT, by any means, expect that it’s a magic pill that will make you remember anything without skill and work ethic.